
Binding
The traditional method requires binding to be hand sewn at the back and has a ¼” seam for the binding. However we recommend machine sewn binding as it is faster to do, looks better (at least we think so) and is sturdier. We also recommend using a seam for the binding that is the full width of the binding as this is also sturdier and looks better, particularly over time. Finally we recommend straight seams rather than bias seams, as they are easier to sew and do not stretch.
The width of the fabric strips that you cut for the binding depend on the seam width, the final binding width and whether you are going to hand or machine sew the back. Our preferred option is for binding machine sewn at the back and with ⅜” seam and ⅜” final binding width. Quilt Master patterns will give the amounts of material required for the binding, using this option.
The next section gives instructions for our preferred method of machine sewing binding. If you want to hand-sew the binding, then there are many web-sites giving instructions. Before you commence, trim the quilt evenly around the edge, measuring carefully from the inner edge of the outermost border. Since quilting may have pulled the border inwards in some places, Quilt Master patterns allow an extra ⅛” in the outer border. This means that you should be able to trim to get the outer edge of the border straight.
Steps for Machine Sewn Binding
These instructions are for a ⅜” seam and ⅜” final binding.
- Cut the binding material into strips 2¾”wide (from selvedge to selvedge).
- Trim the ends of each strip so that they are at right angles to the strip itself.
- Sew all the strips together to make one long piece, joining them with straight ⅜” seams, not on the diagonal. Joining diagonally can lead to stretched ugly seams.

- Press the seams open, this makes it easier to sew the binding to the quilt.

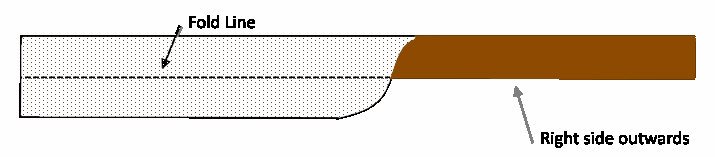
- Fold in half lengthwise, with wrong sides together and press.
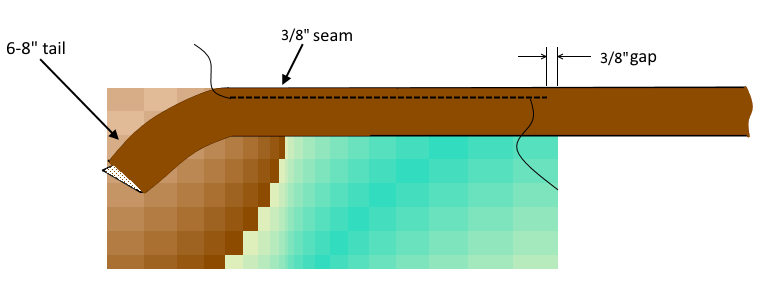
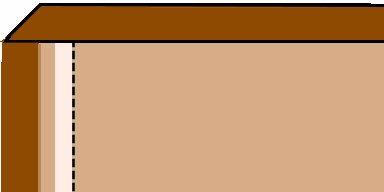
- Leaving a 6″–8″ tail, start sewing the binding to the right side of the quilt from the middle of one side, using a ⅜” seam. Stop sewing ⅜” from the end of the first side and reverse stitch a few stitches to secure the end.
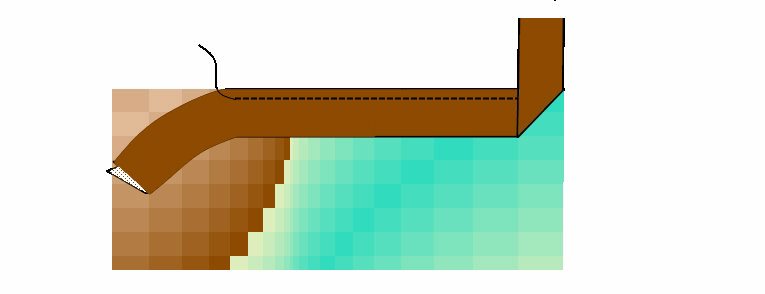
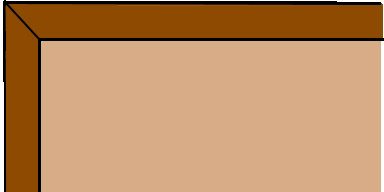
- Fold the binding away from the quilt at a right angle, as shown below:
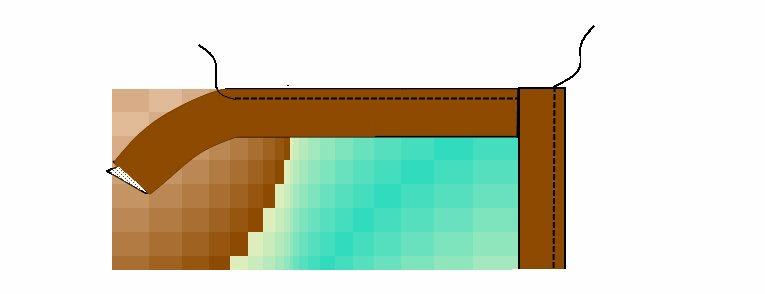
- Then fold it down along the next edge to be sewn, and sew ⅜” from the edges. Repeat at all four corners.
- Stop sewing when you are around 10″ from where you started. Cut the binding to leave a tail that is roughly half the length of the gap.
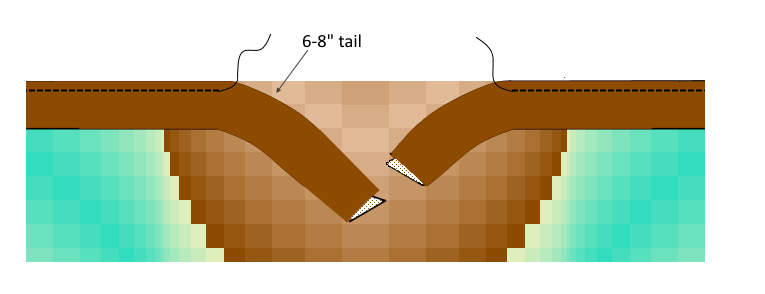
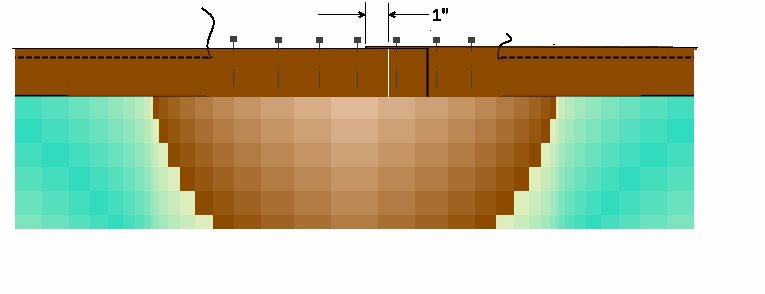
- Using pins, lay the two parts of the binding firmly and tightly along the edge of the quilt, with the longer tail uppermost:

- Measure ¾” from the end of the short (underneath) tail, towards the end of the longer (upper) tail:
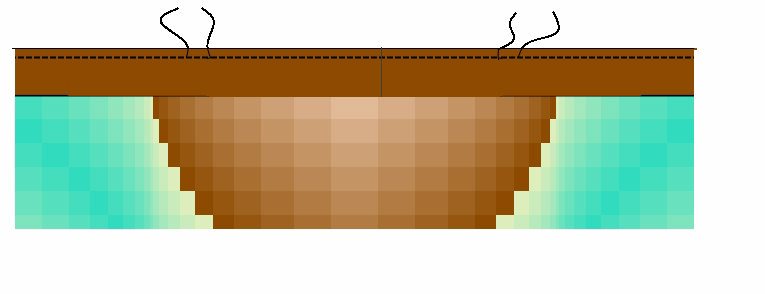
- Remove the pins, and cut the upper tail along the marked line.
- Open the two ends of the binding up and sew with right sides together, with a ⅜” seam. Folding the quilt can make this easier. Press open.
- Lay the binding back against the quilt, and complete the seam.
- Working around the quilt (with the right side upwards), press the binding away from the quilt. Use the point of the iron to press the mitred folded corners.
- Finishing the binding:
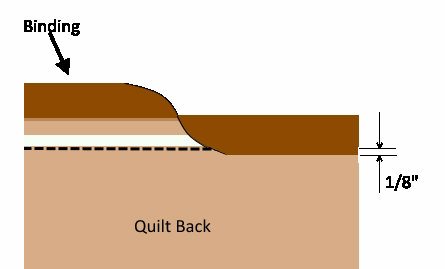
- On each side of the back of the quilt, just ‘above’ the binding seam, iron on ¼” fusible tape After experience you may find that you can finish the seam without using the fusible web. Instead press the binding as in steps b–c, then use a seam guide set at ⅜” and hold the binding folded as you sew it. It should be placed in the seam allowance as close to the seam as possible:
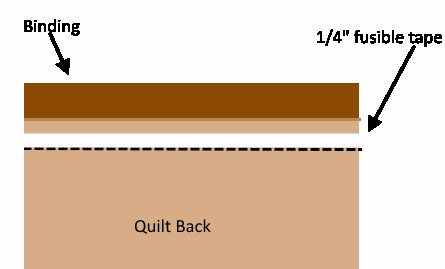
- Remove the backing from the fusible tape and fold the binding over it tightly: it should extend around ⅛” beyond the line of stitching. Press to fuse the binding to the quilt.
- At the corners fold into a mitre.
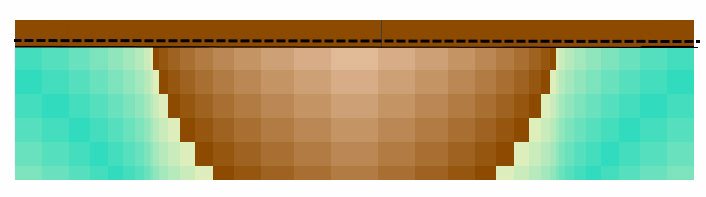
- On the right side of the quilt stitch within the binding, as close as you can to the seam (around 1/16″ works well).
- On each side of the back of the quilt, just ‘above’ the binding seam, iron on ¼” fusible tape After experience you may find that you can finish the seam without using the fusible web. Instead press the binding as in steps b–c, then use a seam guide set at ⅜” and hold the binding folded as you sew it. It should be placed in the seam allowance as close to the seam as possible: